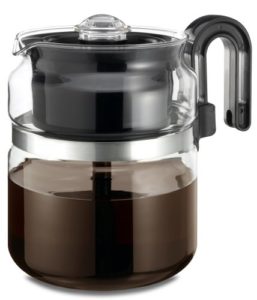
 Medelco 8 Cup Glass Stovetop Percolator
Last updated : February 2021
If you’re searching for information on how to use a glass percolator, you’ll be glad know that you are in the right place.
On this page will be answering questions, individuals who were probably asking themselves… but had no source of information to get answers to their questions.
The kind of questions are:
Could I use it on an electric stove or did it need a direct gas flame in order to function?
If so, is it safe at all temperatures?
How am I supposed to clean it?
However, if you landed on this page and you’re shopping for a glass percolator, one excellent option for a home percolator is the Medelco 8 Cup Glass Stovetop Percolator, offered on Amazon.com at a really affordable price. It is a sleek, feature packed percolator that can produce consistently delicious and bold cups of coffee every time.
If you’re still with us …
To read a full review of the Medelco 8 Cup Glass Stovetop Percolator, click HERE – Now !
For information on how to use a glass percolator, continue Reading…
The Difference between using a Vintage and a “Current” Glass Percolator
Contents
What you should know…
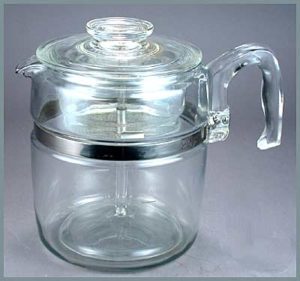
There is a distinct difference between the use of a vintage glass percolator and one that was made in recent years. Vintage percolators (that is, those which were made before the 1940’s) were built to be used directly on top of a heating element. However, after the 1940’s, most of the stoves that were made had a higher heating/burner level as compared to the stoves made in previous years.

Also, it is worth noting that after the 1940’s the formulation of the glass used to make glass percolators was changed to be more resistant to physical shock rather than extreme thermal resistance. As such, a heating element (which is basically a special bent wire/ wire grid that works as a heat distributor) ought to be placed on the burner and the vintage percolator placed on it (not directly on the burner).
Although there are some people who have claimed to be using their glass percolators over gas and electric stoves without the heat distributor with no problem, it is vital to note that they do so at a high risk of causing the formation of cracks (worse still, shattering) their entire unit. Any strong heat source (applied directly on the glass without a heat distributor) may cause the glass to heat up too fast (and too unevenly) for the glass to handle.
The being noted, the process of making a brew using a glass percolator (whether vintage or current) is relatively the same as that of using any other percolator.
A Step by Step Guide on How to Use a Glass Percolator: Brew Starbucks-Grade Coffee in Your Own Home
Here is a video that will help you to use a glass coffee percolator.
Click here to check out the popular Medelco 8 Cup Glass Stovetop Percolator at Amazon.com where you will be able to see the product page directly, all the features and you will also be able to read the customer reviews of this product.
Step 1: Measure your Water and Your Coffee
As a general rule, you should always use 8 ounces of water for each tablespoon of coffee grinds you want to place in the unit’s basket. Remember, too little water may result in an extremely strong brew whereas having too much will result in a weak brew (coffee-flavoured brown water. Yuck!).
Step 2: Pour in/ Place Main Ingredients in the Unit
Remove the unit’s lid, stem, and basket. Pour in your measured water into the unit’s pot. Place the stem and basket back into the unit in a way that ensures that stem extends to the bottom of the pot whilst the basket sits on top. Place your measured coffee grinds into its basket keeping in mind the aforementioned measurements.
Step 3: Introduce the Heat
When using a vintage glass percolator, be sure to place the heat distributor/ wire mesh grid on the heat source before placing it. Modern-type glass percolators can be placed directly on the heat source but you must remember that any type of glass is susceptible to unexpected cracking and shattering.
Step 4: Monitor
It is important to monitor the whole percolating process to prevent the pot’s damage or over-brewing which is known to make very bitter, strong coffee. Luckily, unlike other types of coffee percolators (which are made with only the glass knob as the only see-through feature), glass percolators are entirely made out of glass and allow a brewer to monitor the entire process. This means that you can see exactly when the brew turns to your desired color/ darkness and know when it is ready to serve precisely according to your taste.
Step 5: Serve and Enjoy!
RELATED: All You Need to Know About Pyrex Glass Percolator Care and Storage